This page is for the 2009 game. For the original 1988 game, see Bionic Commando.
Bionic Commando (2009) is an action adventure game developed by GRIN using the Diesel engine and published by Capcom. The game features both a singleplayer campaign and a multiplayer mode, though as of 2022 the online mode is no longer available due to the closure of its online servers.
The player controls Nathan Spencer and his main characteristic is the ability of using his Bionic Arm, which allow him to swing around buildings and throw objects. The game mixes fluid traversal movement and packed action gameplay with multiple firing weapons and type of enemies on a level based structure.
The game is part of the Bionic Commando series that has started with the homonymous NES title in the 1987, which received a remake called Bionic Commando Rearmed that was developed by GRIN aswell.
General information
- Steam Community Discussions
Availability
Essential improvements
Skip intro videos
|
Download replacement video files[citation needed]
|
- Download Blank Video Files.
- Go to
<path-to-game>\DATA\MOVIES.
- Replace the
.bik files with the new blank files.
|
Game data
Configuration file(s) location
-
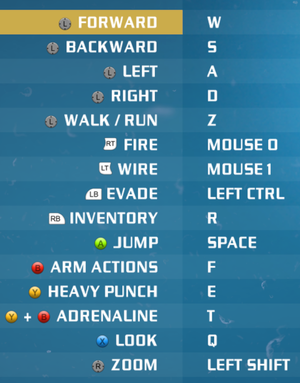
controls.xml stores control bindings.
-
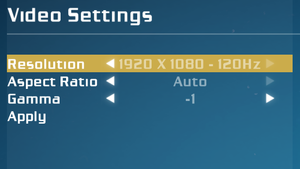
renderer_settings.xml stores video settings.
Save game data location
Video
|
Edit renderer_settings.xml[3]
|
- Go to the configuration file(s) location.
- Open
renderer_settings.xml with a text editor.
- Change
windowed = "false" to windowed = "true"
- Save the changes.
|
|
Force SGSSAA (Nvidia only)[4]
|
- Download and run Nvidia Profile Inspector.
- Search for Bionic Commando in the profiles list.
- Set
Antialiasing compatibility to 0x004010C1.
- Set
Antialiasing - Mode to Override any application setting.
- Set
Antialiasing - Setting to 2x/4x/8xQ Multisampling.
- Set
Antialiasing - Transparency supersampling to 2x/4x/8x Sparse Grid Supersampling (the level must match the previous setting).
- Optionally, set
Texture filtering - LOD Bias to either -0.500 (if using 2x MSAA + 2x SGSSAA), -1.000 (if using 4x) or -1.500 (if using 8x). This will increase sharpness, but may mess up some visual effects.
- Click Apply to save the changes.
Notes
- Don't Alt+Tab ↹ out of the game without opening a menu first, otherwise the lighting will be messed up.
|
Input
- Input device is selected by pressing either ↵ Enter or Start button at the start screen, which disables the other device from that point on.
- The game uses Xbox controller prompts for keyboard and mouse, no fix available.
Bind all secondary weapons to one key
- Since you can't have multiple secondary weapons at the same time (in the single player mode), only one key is needed.
|
Edit controls.xml[citation needed]
|
- Go to the configuration file(s) location.
- Open
controls.xml.
- Find the lines:
<button name="equip_hiker" input="3"/>
<button name="equip_sniper" input="4"/>
<button name="equip_tarantula" input="5"/>
<button name="equip_bulldog" input="6"/>
<button name="equip_mgsj" input="7"/>
4. And for example change them to:
<button name="equip_hiker" input="3"/>
<button name="equip_sniper" input="3"/>
<button name="equip_tarantula" input="3"/>
<button name="equip_bulldog" input="3"/>
<button name="equip_mgsj" input="3"/>
|
Notes
- Do not reset the controls binding via in-game options otherwise even this setting will be reverted to the default one.
Skip cutscenes by pressing "Space" two times
- The game allow to skip cutscenes by pressing "Enter" after you press "Space".
- For an easier configuration you can modify this behavior by let the game skip the cutscenes after a second press of the "Space" button.
|
Edit controls.xml[citation needed]
|
- Go to the configuration file(s) location.
- Open
controls.xml.
- Find the "skip_cutscene" line (upper line is presented for localize the interested line more easily due to multiple similar entries):
<button name="toggle_weapon" input="r"/>
<button name="skip_cutscene" input="confirm"/>
4. And change it to:
<button name="skip_cutscene" input="space"/>
|
Notes
- Do not reset the controls binding via in-game options otherwise even this setting will be reverted to the default one.
Navigate through "Info Screen" entries by pressing "Space"
- The game allow to select the specific entries of the "Info Screen" (Objectives, Challenges etc.) by pressing the "Enter" button.
- For an easier navigation you can modify this behavior by let the player select those entries with the press of the "Space" button.
|
Edit controls.xml[citation needed]
|
- Go to the configuration file(s) location.
- Open
controls.xml.
- Find the "confirm" line (upper line is presented for localize the interested line more easily due to multiple similar entries):
<button name="equip_grenade" input="2"/>
<button name="confirm" input="confirm"/>
4. And change it to:
<button name="confirm" input="space"/>
|
Notes
- Do not reset the controls binding via in-game options otherwise even this setting will be reverted to the default one.
Mouse Sensitivity
- In-game mouse movement speed depends on the framerate, the lower is the framerate and higher is the aim speed (in a proportional way so 60 FPS is double the speed of 120 FPS, 30 FPS is four times the speed of 120 FPS and so on). This results in a very difficult mouse control on a lower framerate (e.g. 60 FPS).
- To fix this is suggested to lower the in-game aim sensitivity at the minimum level and then adjust the aim speed accordingly with the mouse DPI settings (800 DPI is enough for accurate gameplay at 60 FPS with the in-game aim sensitivity at the minimum level).
Notes
- At higher framerate (100+ FPS) this issue tend to be a lot less prominent, it's still suggested to lower the in-game aim sensitivity accordingly.
- It's very important to cap the game framerate at a maximum of 144 FPS anyway due to physics issues, see "Frame rate (FPS)" for more info.
Mouse Consistency
- The Y axis is roughly 40% slower then X axis.
- It's possible to have a workaround with mice that support separate DPI sensitivity per axis or more simply by editing the
controls.xml
|
Edit controls.xml[citation needed]
|
- Go to the configuration file(s) location.
- Open
controls.xml.
- Find this line:
<axis name="look" controller="mouse" input="mouse" multiplier="0.05 0.05 0" lerp="1" no_limit="true"
4. And change it to:
<axis name="look" controller="mouse" input="mouse" multiplier="0.05 0.07 0" lerp="1" no_limit="true"
|
Notes
- Do not reset the controls binding via in-game options otherwise even this setting will be reverted to the default one.
Audio
| Audio feature |
State |
Notes |
| Separate volume controls |
|
Music and sound effects. |
| Surround sound |
|
Up to 7.0 output through OpenAL. |
| Subtitles |
|
|
| Closed captions |
|
|
| Mute on focus lost |
|
|
| EAX support |
|
Use OpenAL Soft 1.20.1 or higher for binaural HRTF mixing.[5] |
| Royalty free audio |
|
|
- OpenAL Soft 1.19.0 and 1.19.1 cause distorted audio in GRIN engine games. OpenAL Soft 1.20.1 fixes the audio.
Localizations
| Language |
UI |
Audio |
Sub |
Notes |
| English |
|
|
|
|
| French |
|
|
|
|
| German |
|
|
|
|
| Italian |
|
|
|
|
| Japanese |
|
|
|
|
| Korean |
|
|
|
|
| Polish |
|
|
|
|
| Brazilian Portuguese |
|
|
|
Fan translation: download (TriboGamer) |
| Russian |
|
|
|
|
| Spanish |
|
|
|
|
Network
Multiplayer types
| Type |
Native |
Players |
Notes |
| LAN play |
| 8 |
Versus
Can still be played through LAN party (like using ZeroTier) |
| Online play |
| 8 |
Versus
Not working anymore due to server closure |
VR support
| 3D modes |
State |
Notes |
| vorpX |
| G3D
User created game profile, see vorpx forum profile introduction. |
Issues fixed
Game crashes on startup
Fix missing OpenAL32.dll and Missing Sound Card
Other information
API
| Technical specs |
Supported |
Notes |
| Direct3D |
9.0c |
|
| Shader Model support |
3.0 |
|
| Executable |
32-bit |
64-bit |
Notes |
| Windows |
|
|
|
Middleware
|
Middleware |
Notes |
| Physics |
PhysX |
|
| Audio |
OpenAL |
|
| Cutscenes |
Bink Video |
|
System requirements
| Windows |
|
Minimum |
| Operating system (OS) |
XP SP2, Vista |
| Processor (CPU) |
Intel Core 2 Duo 2.4 GHz
AMD Athlon X2 5200+ 2.6 GHz |
| System memory (RAM) |
1.5 GB |
| Hard disk drive (HDD) |
8 GB |
| Video card (GPU) |
Nvidia GeForce 7800 series
ATI Radeon X1900
512 MB of VRAM
DirectX 9.0c compatible
Shader model 3.0 support |
| Sound (audio device) |
DirectX 9.0c compatible |
Notes
- ↑ 1.0 1.1 File/folder structure within this directory reflects the path(s) listed for Windows and/or Steam game data (use Wine regedit to access Windows registry paths). Games with Steam Cloud support may store data in
~/.steam/steam/userdata/<user-id>/21670/ in addition to or instead of this directory. The app ID (21670) may differ in some cases. Treat backslashes as forward slashes. See the glossary page for details.
References


